Showing posts with label jade's house. Show all posts

Monday, May 21, 2012

a brick patio

when we moved into this house 2 years ago, we knew it would be a constant work in progress.  and we love that.  we love making this place our own and learning new things along the way.

one of the things that drew us to this house was our back porch.  it's right off the kitchen and completely covered.  i blogged about it last spring in this post.  it's like another room.


we haven't done much to the porch since we've moved in.  added furniture, strung some lights and that's about it.

to the far right of the porch, there are steps that lead down to our backyard.  as soon as we moved in, we new this area was going to need some work.

exhibit A which i blogged about here:


every time you went into the back yard, you had to duck.  there were these random beams that prevented you from easily getting into the back yard.


we quickly realized that this section of the deck served no structural purpose, so we knew it had to go.

bye bye!


next problem to address?  safety.  we needed a hand rail.

done.

now, the lack of grass and appeal when you went down the stairs.  when ever it rained, this area became a mud pit.  so, last fall, the hubs laid first brick patio.


as you may have noticed, i've got myself a pretty handy man!!  =)

we used it some last fall.  roasting marshmallows and grilling.  but we couldn't wait until this spring when we could really take advantage of it!

as soon as i could, i planted some flowers and shaun got me some awesome green adirondack chairs for mother's day! we moved the grill and i added a random pallet in it's place for more flowers.


such an improvement, right???

we are probably outside everyday that it doesn't rain.  we love it out here.

but i felt like it was still missing something....

we were given this rod iron table and chairs a few years ago by shaun's dad.  it's a great set.  and very neutral...


it's just blends in with the brick patio.  so, the cooks got daring!


and i'm OBSESSED!!!


it's called peacock blue.  it's made by valspar and it's their outdoor, no rust spray paint.

i also made some pillows today too with some fabric i already had.  


i couldn't believe how well it matched.  i had to make pillows, right?!?!


i LOVE our back yard now.  i can't believe how far it's come in just 2 years.  (and yes, we added this playset this year too).  

from this...


to this...


we even added more lights.  we had some strung around the covered porch, but now they are hang over the brick patio too!


isn't it lovely?  

and see that swing on the porch?  2 things.  1 - i'm blogging from there right now.  and 2 - it got a little make-over too.

it used to be just brown wood.  no treatment, nothing fancy, just a brown wood swing.

so yesterday when we were at lowes, i found a quart of mis-tint paint for $2.50.  what do you think?


i've only put 1 coat on so far, and i think i like it...


kind of rustic, right?  i don't think i want a really "finished" look, but i'm also kind of worried it looks like i'm only half way finished.

be honest - what do you think??

SO - do you want to come over for a party???  we love to grill out and can't wait to be outside even more this summer!

it even smells good here!  i planted a gardenia bush this spring and love everything about it.


awwwww.  the smell of DIY!!  ;)

Sunday, January 22, 2012

a little weekend project

well, we didn't get to put C in her big girl bed this weekend like we origianally planned.  the people painting her bed took a little longer than we thought.

so, since i was in the frame of mind of getting her room ready on saturday afternoon, and then wasn't able to, i decided to tackle another project i've been thinking about.

her bathroom.

when we first moved in, we snapped this picture

terrible.  just terrible. 

pinkish tile on the walls.  brown tile on the floor.  and that seat cushion....  terrible.

but remember, we bought this house knowing it would need some work.  there is a lot of potential.  good bones.  and a great neighborhood.  i mean, remember the kitchen??

so, we know we will change this bathroom someday, but for now it's clean and functioning, and it's C bathroom.  so, after we moved in i found a shower curtain that was pretty neutral, put a couple random pictures on the wall, and left it at that.


but lately i've been thinking about the pinkish tile and the fact that this is C's bathroom.  why not just embrace the pink?  it is a little girls bathroom after all.  and i think i'm fine with making it a little girly.  trying to make it look brown just isn't working.

but finding the right shower curtain to work with the tiles was going to be tricky.  everything was either too pink or too girly or too childish.

until i saw this


HELLO amazing amy butler shower curtain!  and HELLO being on sale from $40 to $10!  that's right.  great colors, obviously girly but not too girly, and only $10!


so, this inspired me to give this bathroom a little face lift.  emphasis on the word little.  this project was kind of out of nowhere for the hubs.  and we just spent money on some new furniture for C's room, so i was going to do my best with what i had.

i decided to paint the walls the same color as C's room.  i had plenty of paint left over, and the yellow looked good with the tile and the curtain.

so, this


went to this


not too bad huh?  i know it's hard to tell the walls are yellow in the picture, but i was night.  bad lighting...

i think now the tile kind of looks like it was on purpose.  kind of... =)

the other side


so, heres what i did spent money on.

the shower curtain - $10
the ballerina towel (doesn't really match, but C loves ballerina's right now) - only $3
orange wash clothes in basket on top of toilet - $5

that's it! 

the art & frames i already had.  the ABC art above is just something i created in Word.

the art above the toliet - well, i love it...


a few months ago i found some katie daisey stationary.  so cute.  i knew i would use them as cards, but i also knew i wanted to frame some.  the color in both of these prints matches perfect. 


the basket holding the orange washclothes was used in the bathroom before.  it's not pictured, but it used to be green.  i just sprayed it pink with some paint i already had.  and the little bucket holding her toothbrush, i got that for her pink, orange and yellow party back in september.

so that's it.  one afternoon and $18 later, we get this


i'm kind of crazy about it.  it just feels brighter and cutier and is finally more my style.

i worked on a couple of things for C's new room too, but i'll share those once we finally get her settled in.

hope you had a good weekend!  ready for monday...?

Tuesday, November 8, 2011

gray & yellow master - updated and revealed!

i finally got our little bedroom make-over finished.  well, i finally got it photographed.

it's not much, but i'm really pleased with the change.  our room was in need of something.  it wasn't awful, but it wasn't fun.

before...


 kind of bland, and not much going on.

so, i browsed around pinterest and showed you pictures of ideas i had in this post.


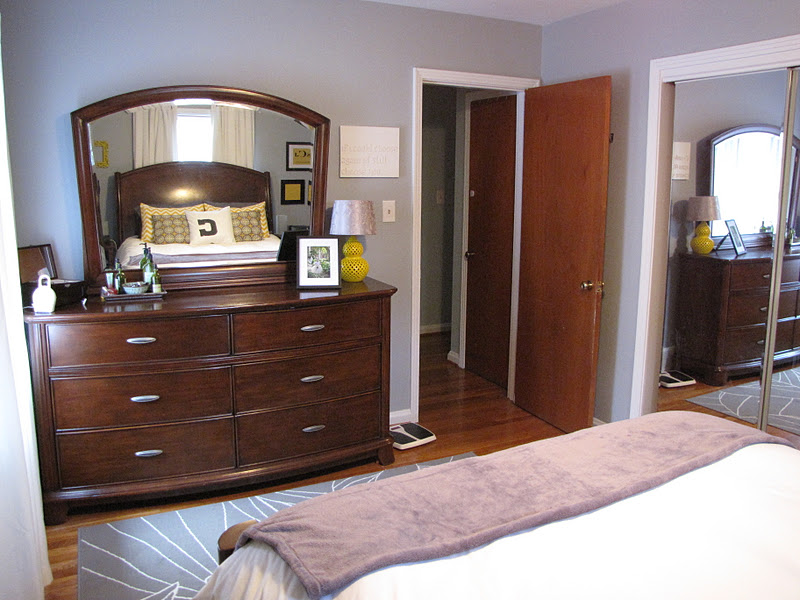
well, here she is!  just a little fancier.


i got the idea from here to have some empty frames.  i really love the pop of yellow on the gray walls.  i got these frames from TJ Maxx for like $6.  they were gold and kind of crazy.  i took out the glass, spray painted them yellow and then hung them.  easy and i love it!

the black frame below has some yellow fabric in it.  no glass.  i planned on leaving the glass in, but then i broke it trying to get it out.  i actually like it better this way.  fabric is just a fat quarter from Joann's.  i think maybe $1.  there was plenty for both frames on either side of the bed.


as you saw in the first post about our bedroom, this wall of photos didn't move or change.  well, it's kind of changed now.  all of these pictures have been replaced with our more recent pictures that i showed you in my last post.  the only thing i added was the word "family."  i found it at Michael's in the dollar bins.  

the silhouette print doesn't really go with the color scheme (it's kind of a pinky red), but i love it too much to move it.  it was a valentine's gift last year.  in the middle of the hands, there is a little s + j.  they can be found here.  such a great website with so many sweet things. 


this is shaun's side of the bed.  i did the same thing with the yellow frames you see about the chest of drawers as i did on the other side.  i decided not to put them in the exact same spot on his side because i didn't want too much symmetry. 


what i did add to his side of the bed was our monogram.  i got the idea from pinterest, of course. it's hard to tell in these awful pictures, but i found some pretty yellow paper from Micheal's and just printed on the paper using our home printer.  it was easy, cheap, and i really like the way it turned out.


here's the other side of the room.  not much changed here.
the only thing different is this lamp.  it was there before, but it was brown wood with a cream shade.  the lamp was pretty much the exact same color as our dresser.  so, i sprayed it the same yellow as the open picture frames and bought a new shade.  i really like the shade, but i'm not sold on it in here.  i origianlly wanted a white drum shade, but that is strangely hard to find.  at least in the budget friendly places i'm looking...

also, above the lamp is the art i told you about in the first post.  i found the art here on pinterest and just decided to give it a whirl.  the canvas isn't as big as the nice expensive one, but it's a good size for our room.  it was really easy and turned out cool.  i gave it to shaun for our anniversary this year.


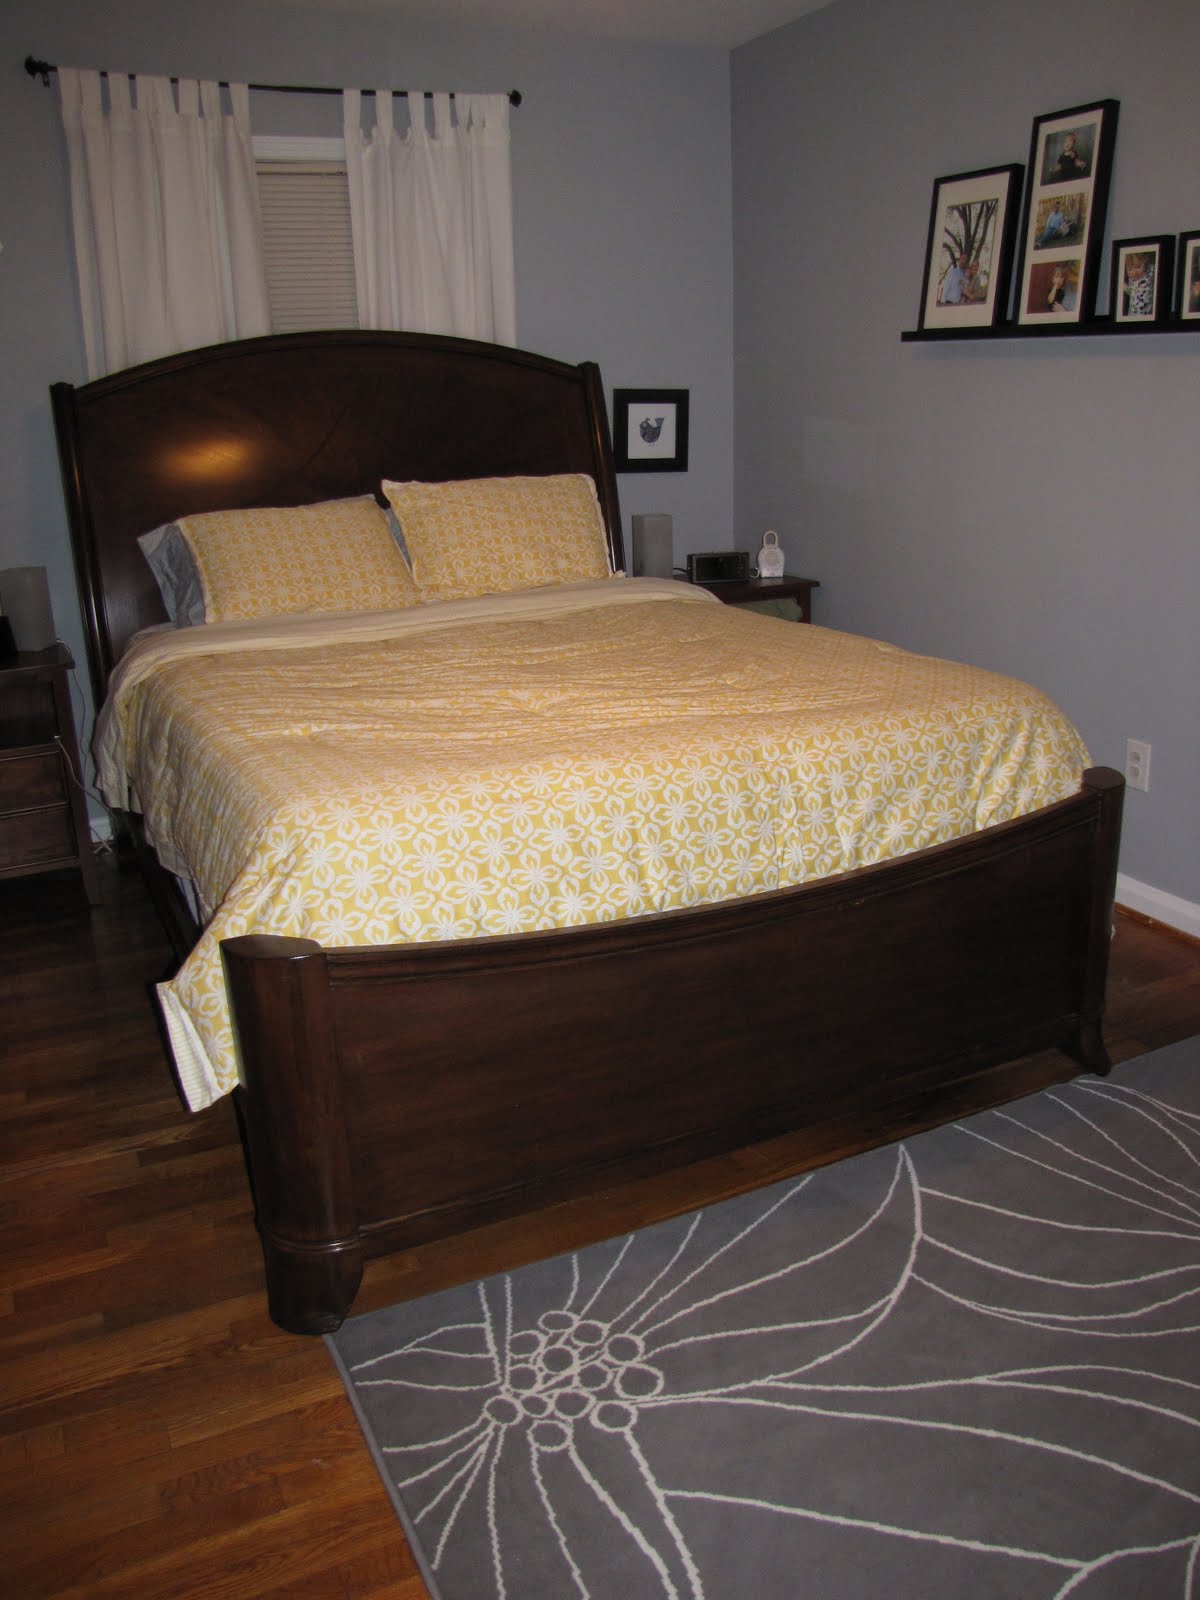
here is a closer look at our bed and the pillows i made.  i LOVE them all!

i loved the idea of the simple monogram pillow that i found here, so i bought some charcoal gray fabric and sewed a C on to some white fabric i already had.  the smaller gray and yellow pillows were made from fabric i already had.  and the big chevron pillows were made from some fabric i bought just for this little makeover.  they were actually my starting point of yellow.  i've been crazy about wanting chevron somewhere lately, so once i saw this fabric, i knew it would be my yellow.


so, that's it!  what do you think?  i think that total for everything was right around $100.  some new bedding, new art and a few DIY projects can really go a long way!  the only other thing i want to update are the bedside lamps.  i think these are too small, but i haven't seen anything out there that i like, so they are staying.

any suggestions?  what color should they be?

thanks for taking a look!  have a great tuesday!

Friday, October 14, 2011

a gray & yellow master?

i've decided to give our master bedroom a little spruce.

with the weather cooling off, it was time to fold up the quilt,that is on our bed all summer, and get out the comforter.  i was trying to put it off, but after waking up cold for a week, i finally changed the bedding.

then, i got the itch to change more than just the bedspread.  nothing drastic.  but i've always loved the idea of a gray and yellow bedroom, i just never got excited about how to execute it.  unfortunately, our bedroom is one room that has gotten the least amount of attention since we moved in over a year ago.  it's small, and there is only 1 way to arrange our furniture (big furniture that we got as a wedding present.  beautiful, but we've always had a problem fitting it in spaces.  we lived in a town house when we first got married and our bedroom was huge.  once we became home-owners, it's always been tricky in smaller rooms)

 
this is the gray and yellow we having going on now.  (the unfinished stenciling on the wall has been covered.  i didn't read the directions and it was sloppy...)

we also have a dresser with a mirror that i didn't take a picture of for some reason.  it's to my right in the above picture, kind of across from the foot of the bed.

so - i've decided to spruce her up!  i've been browsing pinterest and have been pleasantly bombarded with all kinds of great ideas!

i love these two pictures below, mostly because of the all white bedding.  i've always wanted white bedding, but then would go with some sort of pattern because i thought plain white was too boring.  well, this time i went for it.  i found a solid white, simple duvet cover at target for $25.  not the most amazing quality, but i'm, as usual, working on a budget.

i was drawn to this picture because it not only has the white bedding, but there are curtains behind the bed.  i'm not sure if there is a window behind them or not, but with our furniture being so big, the headboard in front of the window was our only option.  we hung the curtains so they are centered over the headboard, even though the window isn't centered over the headboard.  did that make sense? maybe i'll show you are little trick one day.  i'm also loving the big black and whites of what looks like their wedding.

 i love the blankets at the foot of the bed in both of these pictures.  i would love a yellow blanket, but the gray looks so cozy.  and yellow blankets are surprisingly hard to find.  i also love the simple framed prints above the bed.  i bet it would be easy to find some scrapbook paper or fabric that would be pretty and inexpensive to frame.


in this picture, i really love the bright yellow frames on the gray wall.  i've already bought and spray painted some gaudy gold gilded frames.  i haven't decided if i'm going to leave them empty yet.


i LOVE the idea of stenciling the wall behind our bed.  as you could see in the pictures of our room, i have a big stencil similar to this.  but for some reason, that stencil is really intimidating me.  i haven't brought myself to attempt it again ever since i messed up the first time.


i've already ordered this fabric for some pillows on the bed, i'm just waiting for it to come in.  i'm pretty sure i'm going to make standard size shams.  i've got some other gray and yellow fabric on hand to make some throw pillows.


speaking of pillows, i plan to make one of these with a "c" on it.  i love monograms.

speaking of monograms (sorry) i've already DIYed something like this for our room.  our couple monogram is the same as my initials, so it works perfect.  this was easy and looks really classy.

speaking of already DIYing, (i'm kind of starting to annoy myself at this point), i made something like this for our 5 year anniversary.  it was pretty simple and it's currently hanging in our room.  it will definitely stay.

so, that's where i am so far.  i've been working on a few things here and there and am excited about seeing it all come together.  i'm trying to re-purpose as much as i can so that i don't spend too much money.  plus, it's kind of a fun game, staying on a budget.

so, what do you think?  any other cost efficient DIY ideas you can point me towards?  i'm looking forward to working on a few things this weekend.

feel free to follow this board on pinterest.  i'm always pinning new things!